Showing posts with label House Project. Show all posts

Friday, December 30, 2011

Irobot Roomba Model 581 Trial Week

A friend owns a IRobot Roomba Model 581 since early this year. I have, been contemplating in getting one since early this year!!!

I already knew I wanted to get a robot vacuum cleaner, but just didnt know which one, which model or brand. I did a lot of research, survey and even wanted to lug one back from the States.

Then my friend offered me to try her unit for a week and see how it goes. 

According to my friend, she is not fully satisfied with the Irobot as she is a super clean person. She tested with intelligent vacuum n seems that it failed her.

So I had the robot in my house for 1 week. In fact, still in my house. On the first week, I used it 3 times.

I had to shut the kitchen door. Confined the robot to the tv area 

 Robot in-action


 Collected dust.hair, etc

 Even tissue paper captured

One week of dirt. 

Overall my experience, quite good. Fulfilled me 99%. 
I wonder if the Picabot can do the same with 70% less the cost?

Monday, September 19, 2011

Plastic Bottle Cap

Was thinking what can I do with a plastic bottle cap? Most time, I seen people using the bottom part of the bottle to store stationary or chopsticks.. Then a thought.. Plastic Bottle cap was meant to tighten the bottle, to prevent leakage.

So I started to experiment.


Indicate where to cut


This was the ultimate test.
Ie: U can use this for biscuits / beans / anything as its air-tight. 
But I wanted to see if water would leak out
Insert as shown. Best you experiment on your own


After I tighten it, I threw the packet against the wall.
Woolaa...no drip, no leak, no break :D


Then I google..I found this...:(
This picture was source from google search.

Tuesday, August 30, 2011

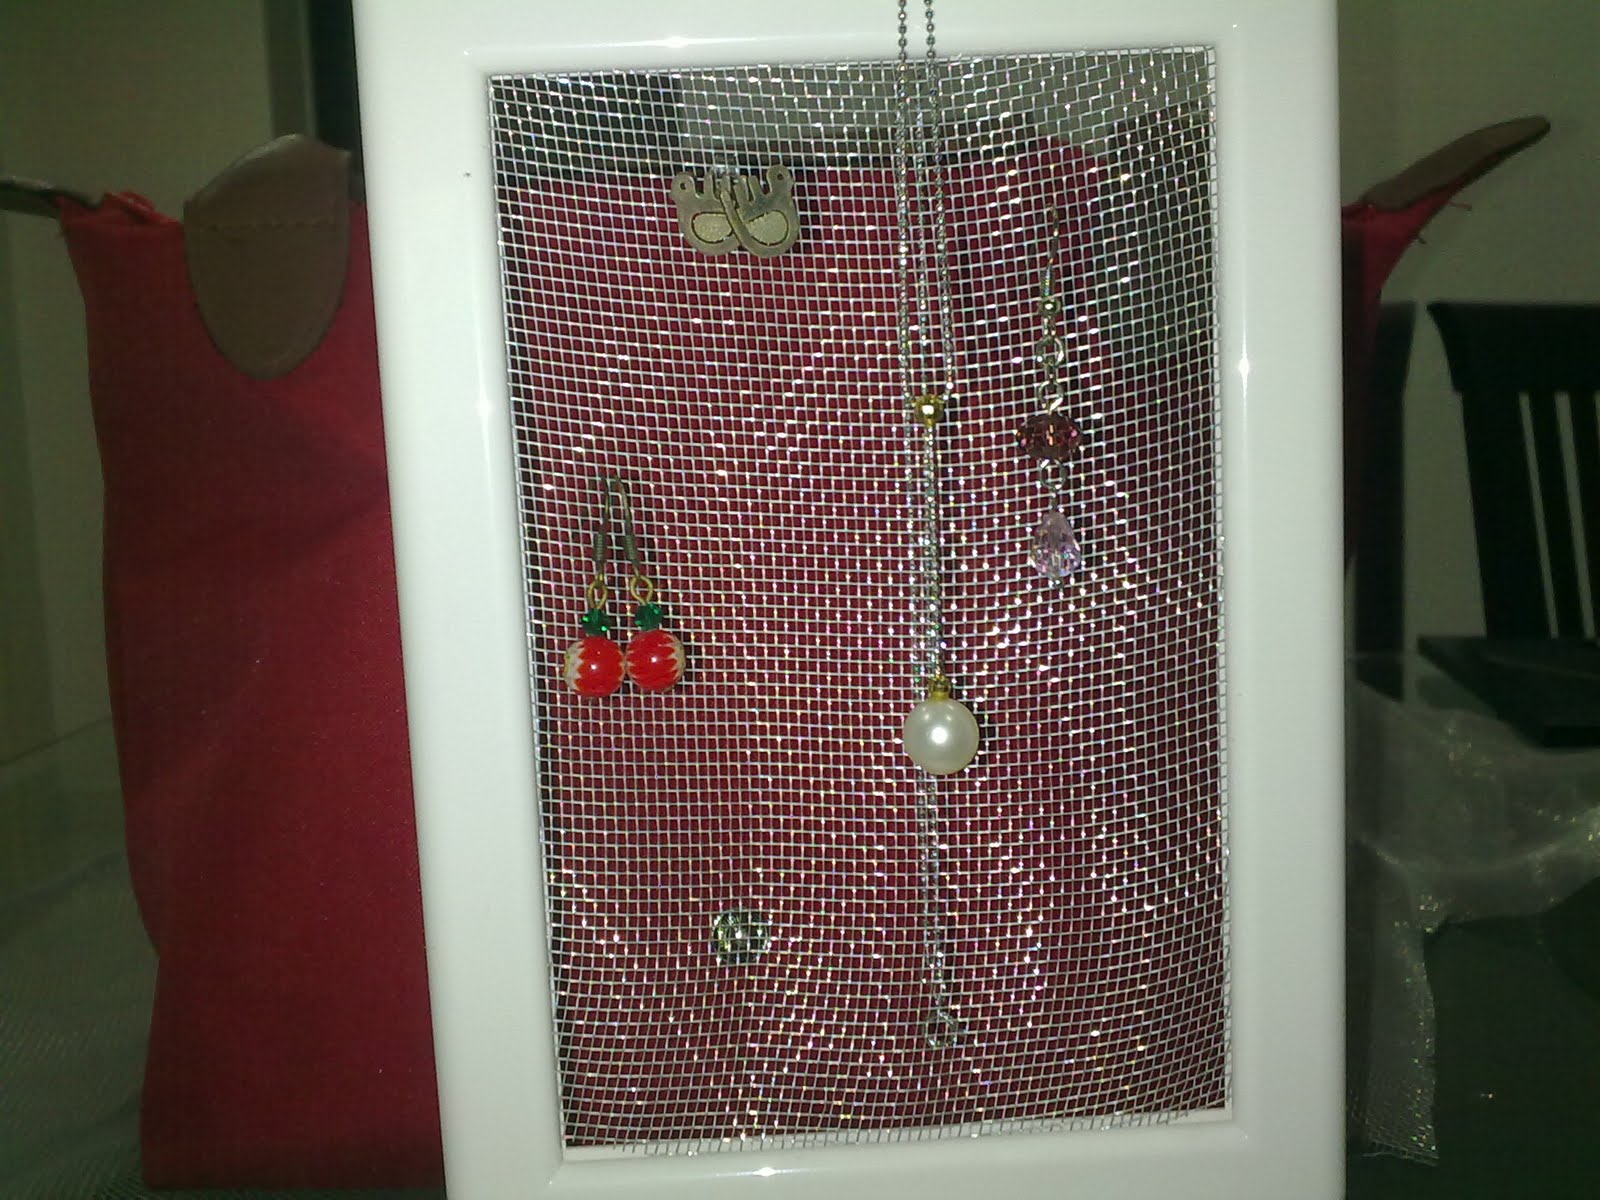
Ikea Photo-frame turn Earring Holder Project

Here is another project I did for the Home Sweet Home.


Got this photo frame at Ikea Mutiara Damansara. Cost: RM4.90


Open it up and assemble it.


In the original packaging, it comes with a plastic board. 
This is for you to stick your photo on it.


I got mosquito net, made out of aluminium. 
Its best to look for stainless steel type but could not find in my neighborhood stores


Use the plastic board that came with the photo-frame as a guide for sizing.
Just cut along the frame size.

Then insert to the frame

 Then start hanging your jewelries


Photo taken with red background

Photo taken with white background

Overall, I love this creation. Good as gifts.

Thursday, April 7, 2011

Phase 2: Living Hall Reno

What do you think of this design?


If you've been following this blog, you will know that I have embarked on my "renovation journey". This is phase 2 after a one-year span of completion of Phase 1.

In this design, I would need new set of TV to fit the new TV cabinet, sofa and coffee table. Some rugs, bean bags (I like Doof) and curtains.

Monday, February 7, 2011

Happy Chinese New Year

Happy Chinese New Year folks. This blog is so rusty and well of cobwebs...Anyway I would like to wish everyone a healthy, wealthy and prosperous Chinese New Year. HUAT ar!!!!

Having a new home should means I should decorate it? I actually didnt have time or mood to decorate because our CNY is a simple affair, nothing extraordinary.

Here is my wall feature which I promised aeons ago. Plain. This wall is huge and a bit empty. So I decided this should be a "memory" wall whereby I will hang precious memories into this piece.


The ID selected a few stickers and allowed me to choose. In fact, besides sticker, she did recommend some other ideas. But I put-off the other ideas cos it will "create more work"..you know..something you need to dust/wipe


That's all for now.

Wednesday, December 8, 2010

Before-InProgress-After : Masterbedroom - Part 1

Very sorry for the long silence.
There is so much I want to talk about the master bedroom. There are good and bad. So, let's start with the easy one.

Wall Paper.

The quotation from the ID included the wall-paper.
The selection of the wall paper was entirely up to the ID
The installation of the wall paper was disastrous

At the end, the ID painted back the wall, remove the wall paper fee.
The outsource company providing this probably had a big lost because they installed it twice or thrice if not mistaken. But since the end result was not satisfying, I didnt want to accept
it.

Two concerns when getting wall-paper
- The wall must be on a smooth surface and of the same level
- Those who installed the wall paper must be seasoned and not a fresh guy out there. I mean, get a SI-fu


First Time Install. Can you see the bubbles?

The bedwall.

2nd Time. Actually I can accept cos no one can see.
But then, based on a professional..ie: the ID, he said he cant accept such lousy work


I asked Joanna if her wall paper were like mine and she said mine was totally unacceptable.

So as you can see, final product, no more wall paper. Painted back cream color.

Again, sorry for the messiness.


Btw, I do not know which supplier my ID used for the wall-paper. Anyhow, I dont like the contractor because they did a lousy job and they also spoiled some of my household item like table and broom. Too bad I dont know the name of the company. Otherwise I would have list it here.

Coming up next, Blinds

Friday, July 30, 2010

Ikea Clock Project


Let's take a break from Renovation and talk about my recent home project. The first being - Ikea Clock Project.

I came to this lady's blog from somewhere and she is so talented in paper cutting. Her craft ideas are amazing too.

One of her post is on Clock Making. So I decided to follow suit!


Bought this from Ikea for less than RM4.00. Diameter about 20cm


Use a knife (I use ruler) to open the cover


Remove the cover
I got this sticker from Ikano for RM8.90. The sticker is "3D" a bit

Cut the sticker

and stick all over the clock

Verdict: I think over crowded. But WTH. Biar la....Siun la..